It’s been a while since I sat down and wrote an article for this blog. I had always thought that working from home would be the dream, but now that I am forced to live that dream it it isn’t all that I thought it would be. Probably it’d be different if I wasn’t required to and could live my private life as I normally would, but that’s besides the point. My point is that now that I find myself working from home full time (and spend a larger part of my time indoors), I no longer think it’s healthy to spend my spare time at the same desk that I already spend 40 hours per week. Instead, I sought other outlets to support my mental and physical well-being in these strange times – many of which are spent offline on purpose. I’ve let my side projects fall by the wayside, but not out of disinterest (and I do intend to pick them up again!).
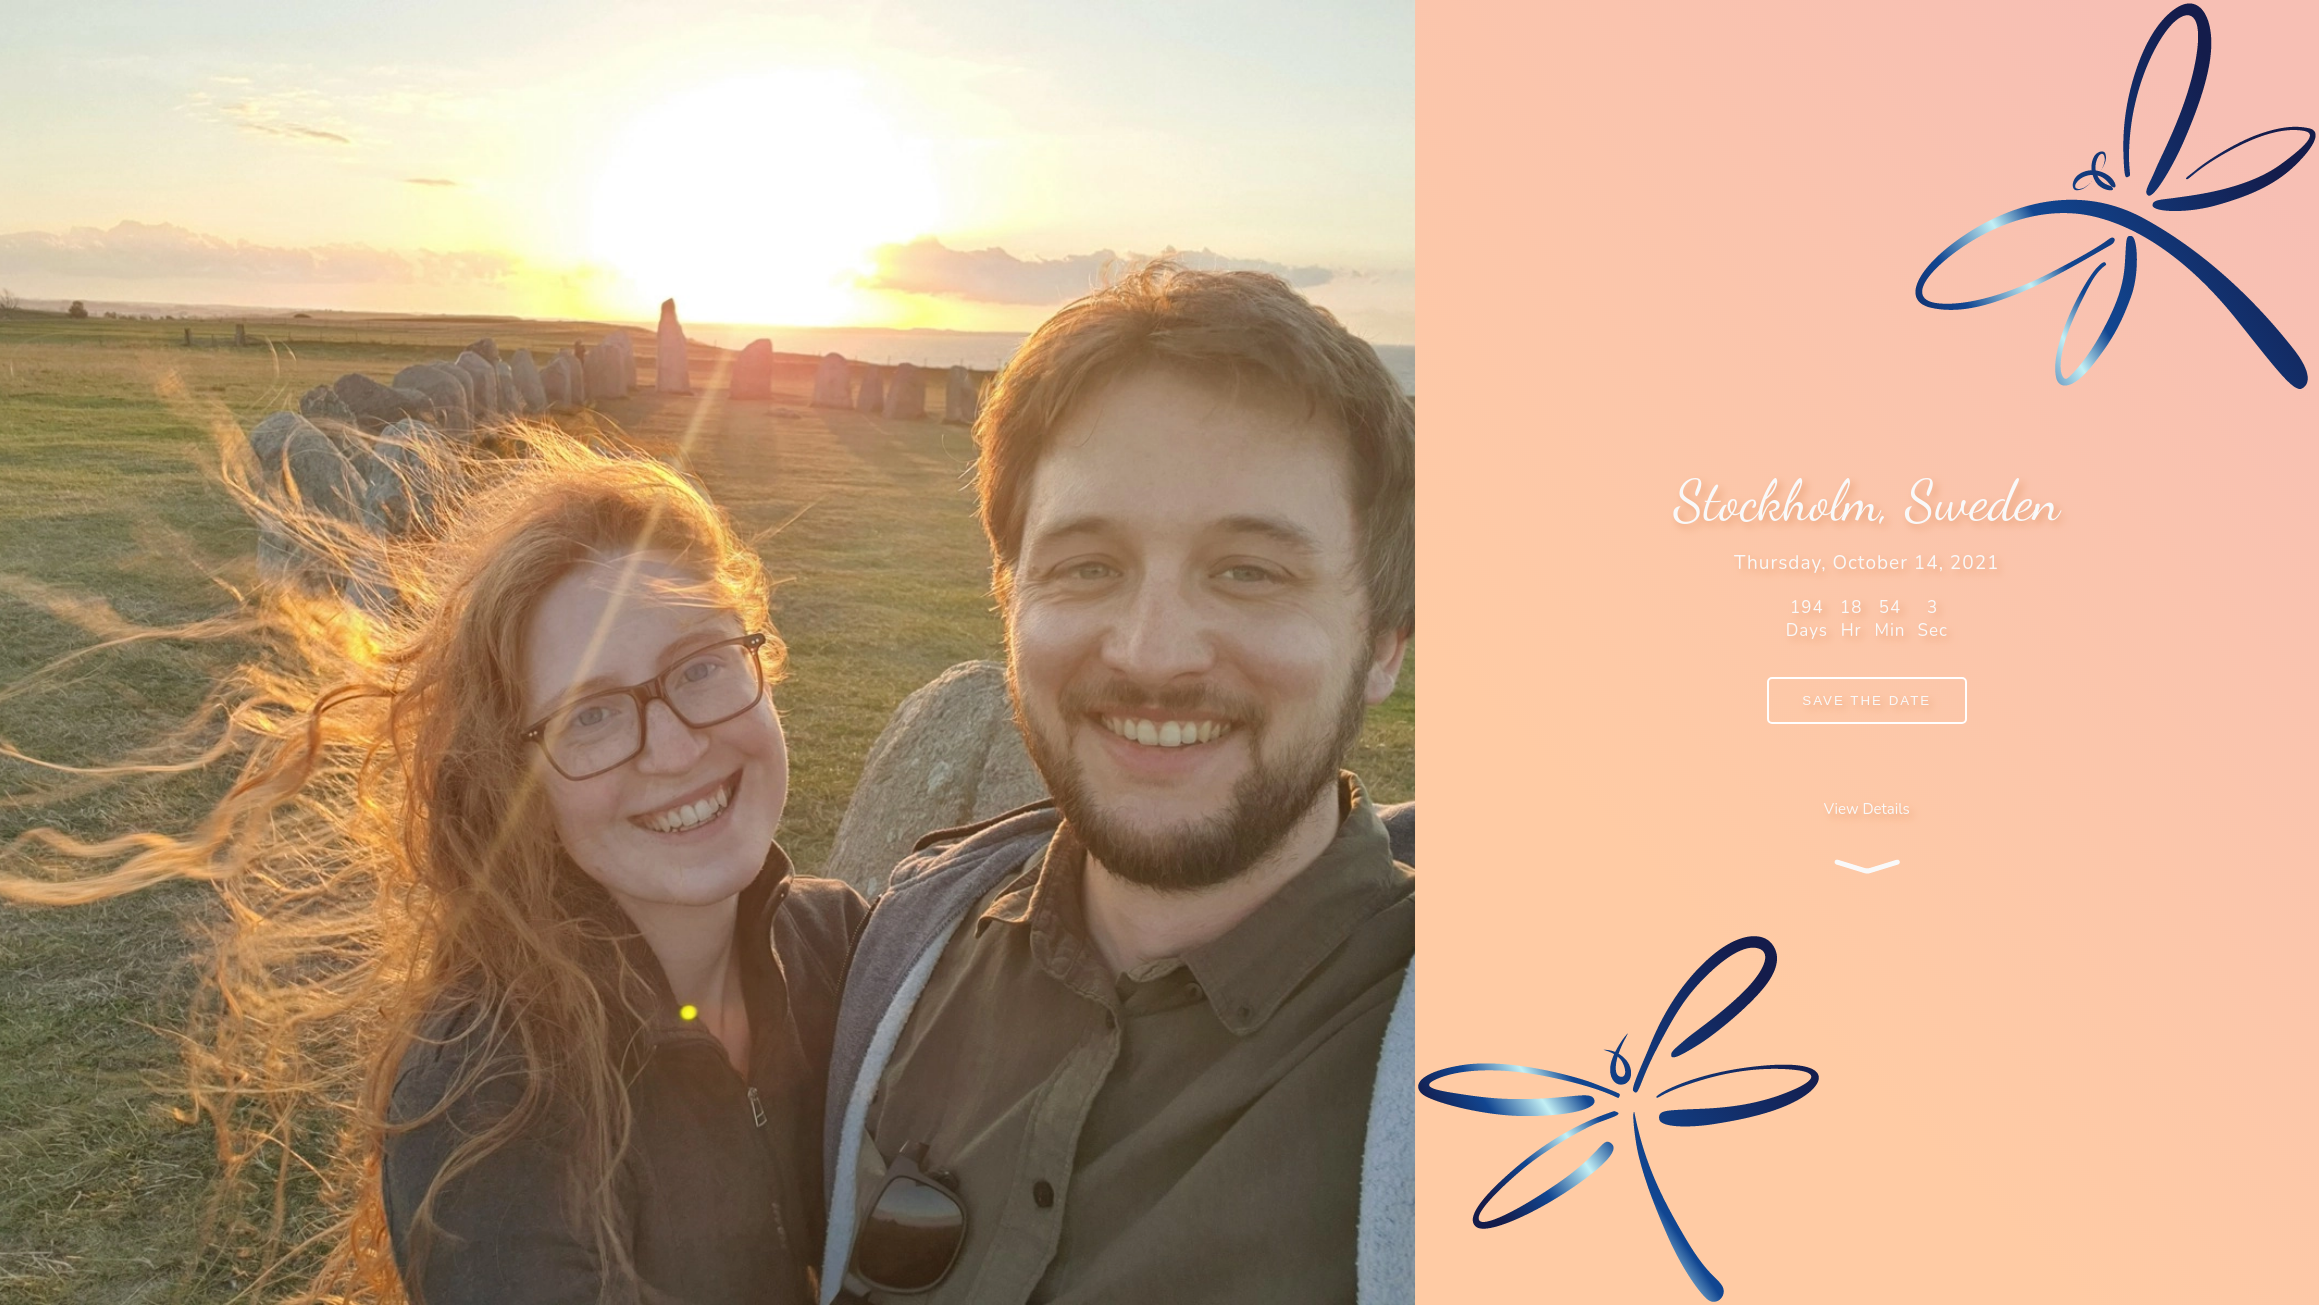
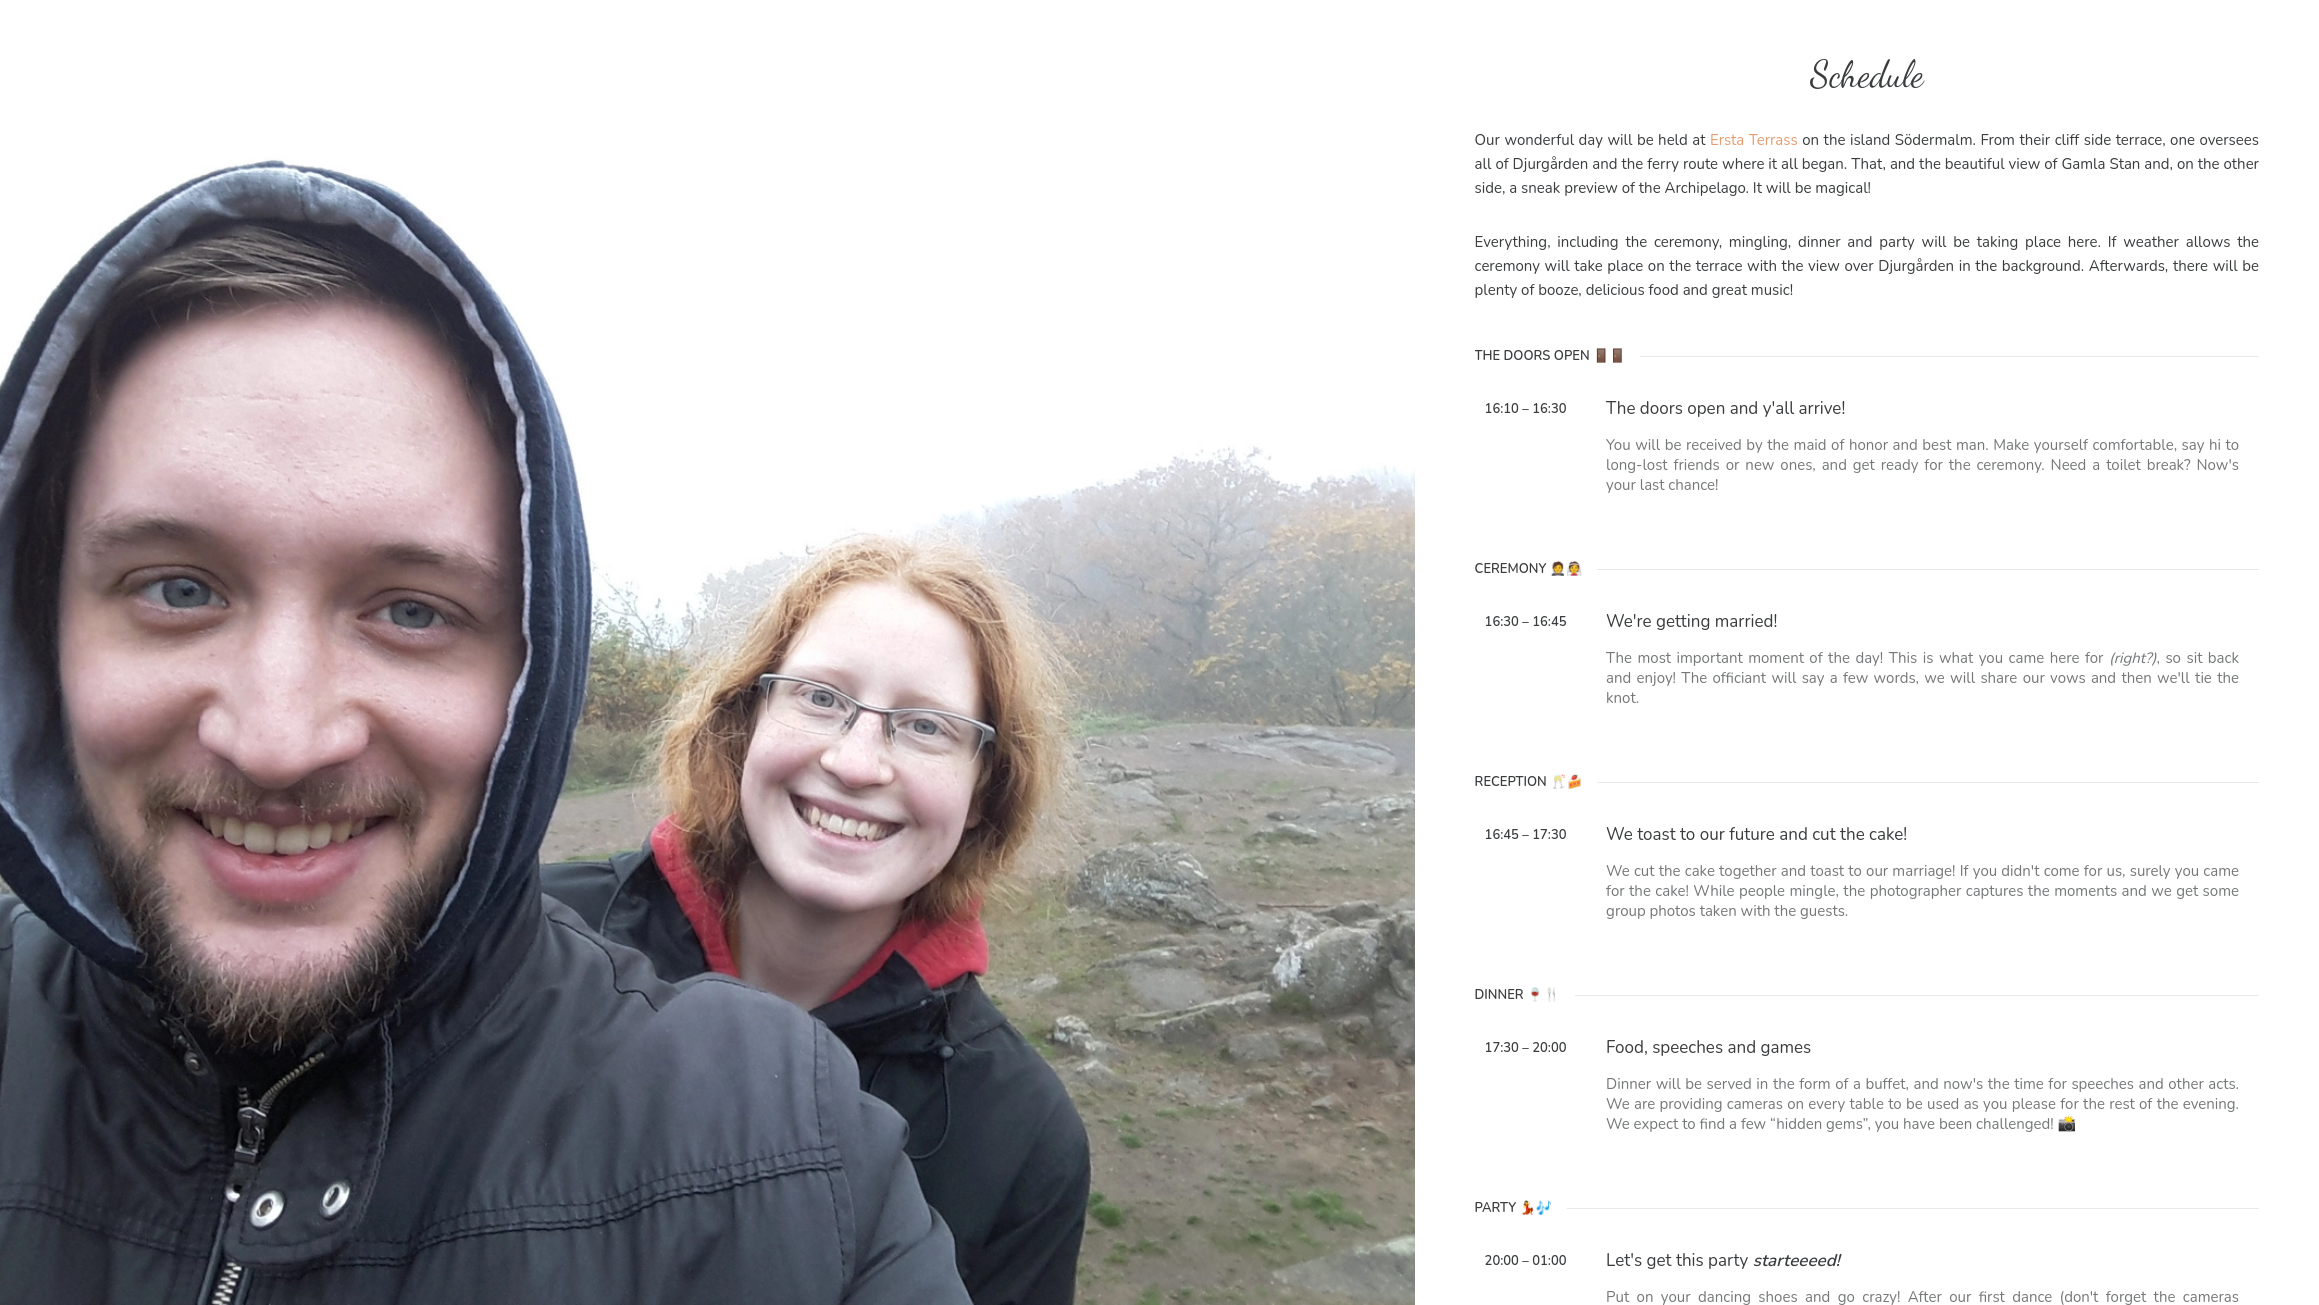
That isn’t to say that the last year has been bad in its entirety. On the contrary! I got promoted, we bought an apartment and, to the topic of this post, we got engaged! As any self-respecting automaker (get it? automatic + maker) of course I wasn’t going to go analog and send wedding invitations by snail mail (well, we did, but hold on) and manage the RSVPs manually. Instead, we built a sweet website with a backend that automates all the administrative tasks. Before we dive in, let me show you the finished product:
Those are just two static screenshots, but they convey the idea quite well: a personal website with a touch of humor that is bright, crisp and informational. We want our guests to have all the information they need upfront (especially those that will travel from The Netherlands) and show off our personal style. The site has multiple sections like the ones shown in the screenshot; each section comes with its own photo. So if the guests have all the information and can save the date, how did we get them to navigate to the website? Here’s where we went analog! We didn’t just want to e-mail everyone or send them a text message, so we actually printed our own invitations with a QR code that opens the website. If you want to browse it yourself, there’s a link at the end of this post.
Here I can be quite brief. I am not a frontend developer and have zero experience with anything other than static website generators and plain old HTML. I did not want to learn a frontend framework for this purpose nor did I want to wrestle with a static site generator that all come with their own opinions and required maintenance. I wanted to keep it simple for such a small one-off project, so I went with plain HTML with handwritten CSS! There’s a sprinkle of Javascript as well, but only where necessary: out of principle I always try to keep Javascript to a minimum (that’s why this site, for example, only uses Javascript for its gallery). It’s mind boggling how much can be done with just HTML and CSS nowadays!
All in all, I am happy with the decisions I made and proud of the end result! The site is lightweight, coming in at half a megabyte including fonts, yet it supports all (most?) modern best practices. It’s mobile first, adaptive and accessible (if you find an issue that I missed, please let me know!) and scores a solid 83/92/100/100 on Lighthouse. The largest punishment in the performance score are the large photos, but that’s something we’re doing on purpose. We do want you to know it’s about us, after all 😉
This is where things get a little meatier, but also more fun! While I enjoyed discovering HTML and CSS again (I seem to always forget things between the little frontend I do) and making a design come to life, backend is where it’s at for me. The requirements are simple: our guests need to be able to save the date. In doing so, they need to tell us who they are and how we can contact them (their e-mail address) and in return they get a calendar invite sent to their e-mail. We’ve approached it like this for two reasons:
So all in all we have one endpoint (well, two if you count the healthcheck) that needs to be implemented. We opted for no authentication, on the grounds that this is a very niche website and in the worst case we’ll receive some additional signups. If we were to require authentication we’d either need to pre-approve e-mail addresses or assign passwords to our guests. The former defeats the purpose of sending out invitations and the second is much too complex for what we’re setting out to achieve. To date we haven’t received any rogue signups, so I’m calling this a good decision (let’s see if this changes after publishing this article 😉).
To implement this simple backend I opted for Go. At work we use a mix of (Typelevel) Scala and Haskell to develop our backend services, but neither of those languages are natively supported by DigitalOcean’s app platform (see below). I could make it work by providing a Docker image, but again the entire point of this was to have fun and keep it simple. Go is natively supported, it’s a language I used to use and like, and we actually happen to be exploring Go for a small part of our stack at work.
I’m fairly happy with this choice: Go has an excellent ecosystem for network programming, so finding out how to do SMTP was a breeze. It’s also very easy to write tests and all in all just an easy language to get a project off the ground quickly. For example, Go’s modules make it easy to manage dependencies and it’s super easy to set up with Github actions (more on that below). Coming from a statically typed world, however, its handling of HTTP requests felt very alien to me. I have to manually check if the request is using the right HTTP method, for example. In the statically typed world that I am familiar with (and prefer), this information would be encoded in the routing logic (typically in the type system) and I wouldn’t have to do anything myself. For a small project such as this one that’s fine, but for anything larger it results in quite a bit of boilerplate.
I’ve mentioned it above: the website and its backend are hosted by DigitalOcean. Specifically, I am using their App Platform. This lets me focus on just the site and the code, and not have to worry about infrastructure at all. I could have used any other cloud provider, but DigitalOcean looked simple (and thus less chances of doing something wrong!) and I wanted to learn something new.
Nowadays, I set up all my infrastructure in code. DigitalOcean provides an excellent Terraform provider, so it fits right in to how I like to manage my infrastructure. I use Terraform to register my app with its static site and service components in the App Platform and then configure that to redeploy on every push to the master branch. I set up a quick CI with Github Actions for the backend code that runs my tests and checks my formatting. I use the same branch-based workflow I always use with PRs to the main branch, even if I am the sole developer. I always review my own code, even at work. I typically find one or two things to improve, before other reviewers get around to having a look 🙂 Deploying on a merge to master is a feature I wasn’t expecting but ended up enjoying a lot. Combined with Github’s Actions, this makes for a very quick and easy CI/CD pipeline. I was expecting to have to deploy things manually when ready, but this is just so much better!
Another feature that I enjoy is that DigitalOcean makes it super easy to control everything in one place. While all my infrastructure is managed by them, they are not (yet?) a domain registrar. Thus by necessity that bit of the infra lives elsewhere. Thankfully DigitalOcean allows us to configure the DNS records on their end (provided you update your domain’s NS records to point to DigitalOcean’s name servers). Thanks to this feature all my infrastructure is managed in the same location: Terraform! Just how I like it.
Finally, to ensure deterministic builds and to make managing this project independent of the machine I’m working on, I added a quick Nix shell environment. For those unfamiliar with Nix, this basically gives me a deterministic, virtual environment within which all the tools required to build and deploy the website are present. This environment is entirely separate from the host OS, so that stays clean. It means I can work on the site independent of the machine (so long as it has Nix installed) and am guaranteed to have the same versions of e.g. Terraform and Go at my disposal. This is something we’re heavily invested in at work and something I’ve come to appreciate. I am now working on setting up similar environments for all my side projects!
With the current version of the website, our guests can save the date according to the process described above: they “sign up” with their e-mail address and name and the backend sends them an e-mail (with a BCC to itself) with the calendar invite. Soon we will add another feature, which is for our guests to RSVP. We’ll of course need to let them know that this is now ready, which we will do by sending an e-mail to the addressable group we have from everyone that signed up. At this point we might opt for a database (since we’ll be closer to the wedding, the costs might be reasonable), but more likely we’ll try something cheaper (I’m Dutch, after all!) such as the Google Sheets API to manage a spreadsheet instead. This should be easier for my partner to manage.
Finally, with many of my close friends being software engineers or otherwise in IT, I of course had to hide an easter egg somewhere. Placing it in the HTML would be too easy (and indeed, this was immediately perused). Since the infrastructure wasn’t under my control, I had limited possibilities. What I did next will shock you!
The e-mail that I send contains both the HTML body and the base64-encoded ICS file. This means that it’s has a “multipart media” mimetype (mimetype multipart/mixed). According to RFC 2046 the body of the e-mail must then contain each body (the HTML and the base64-encoded ICS file), preceded and followed by a “boundary delimeter line”. The value of the boundary delimeter is specified in the Content-Type header and we are free to choose it. Hence, here is where I added my little easter egg: my boundary delimiter value is set to drinksonmeforwhofindsthis. I am pleased to say that so far, I need to buy drinks for two people! 🎉
All in all, I am stoked about the end result. It’s truly built with (and because of) love, and I spent time working on a side project that I enjoyed again! The frontend looks amazing (not just according to us!) and I am proud of how light it is yet how good it scores on all the best practices. The backend was a fun experiment back into Go, and I learned how to do SMTP. I’m also particularly pleased with DigitalOcean’s App Platform and how simple it is to provision with Terraform & just pushing to the repo. We’ve received compliments from almost all our guests, some of which even thought we used a commercial project to build this for us. That’s a feather I can stick up my ass, if any! If all this made you curious and you want to see the website for yourself, it’s over at www.aggiandjente.wedding.