A little less than a year ago I finished my home made server/NAS. I have been meaning to blog about the process since, but never got around to it. Since my MSc thesis is keeping my mind busy during the day, I wanted a project that was not programming to relax my mind after a long day. I decided to try my hand at something I had never done before and create my own 3D printed case.
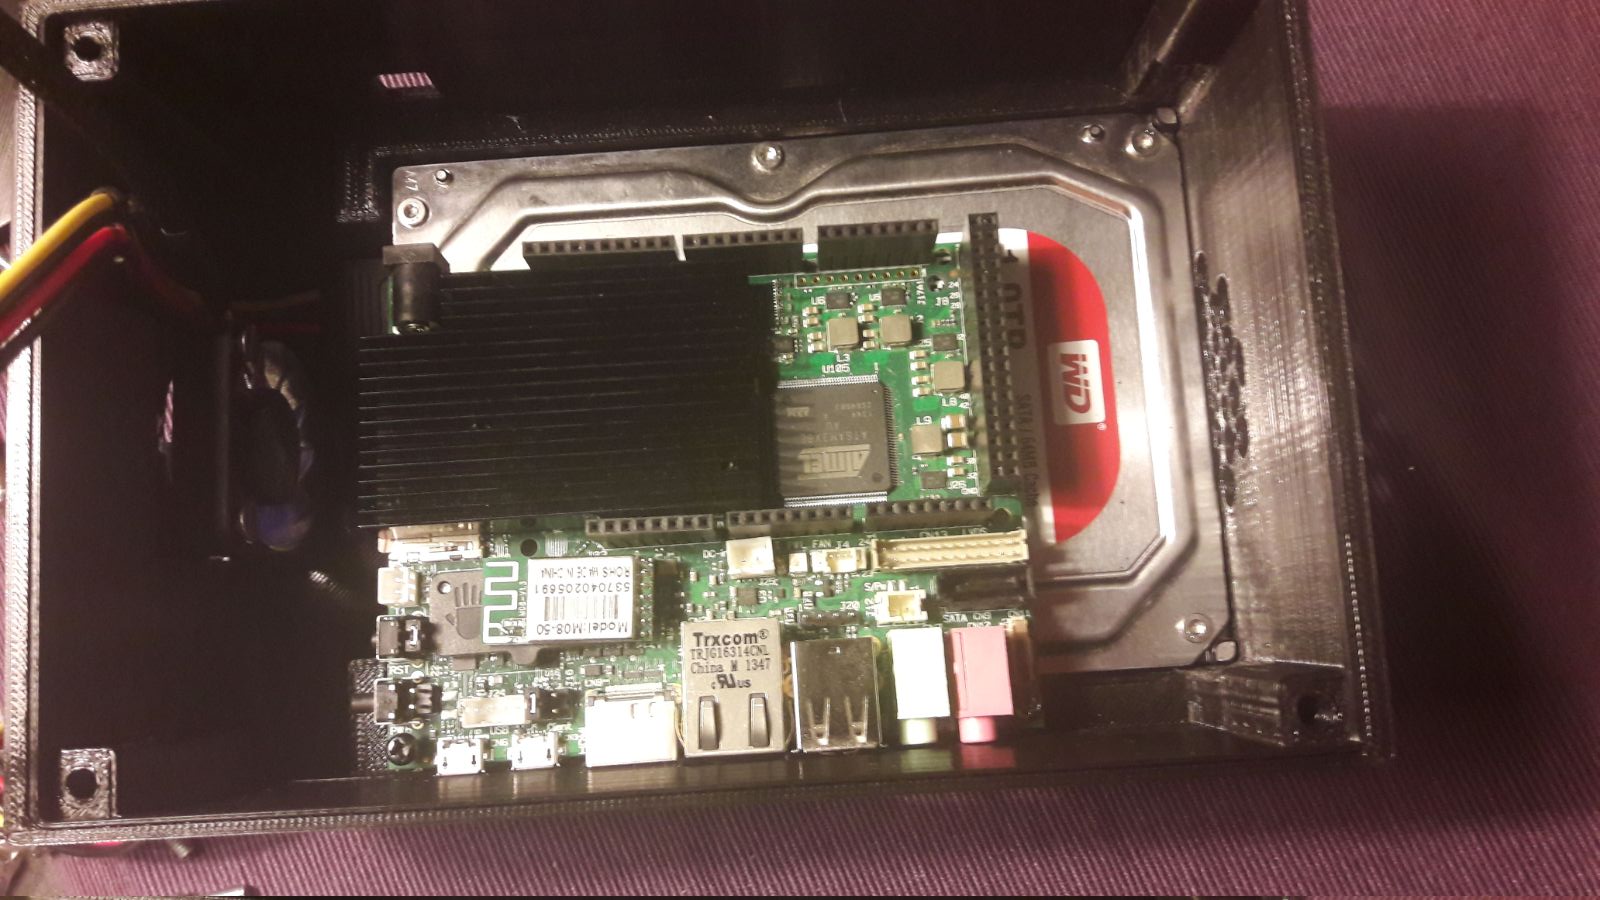
Before we dive into the old and new cases, I’ll list the server components so you have a basic idea what I was dealing with. The server is a UDOO Quad, kindly sent to me for free by a very friendly Norwegian guy who had no more need for it himself. He insisted he paid for shipping too, and even included the power cable and a 64GB mini SD card. If you’re reading this, Ole, thanks!
The server is currently functioning as a NAS and an IRC bouncer through ZNC. In the future, it will also serve as a local Git server and be the driver behind some home automation projects that I am currently working on and will be writing about later. For those interested, the OS is Arch Linux ARM, simply because Arch is what I know best and can tweak exactly into what I need: at the moment, there is only 70MB of RAM in use with a 0.00 load average.
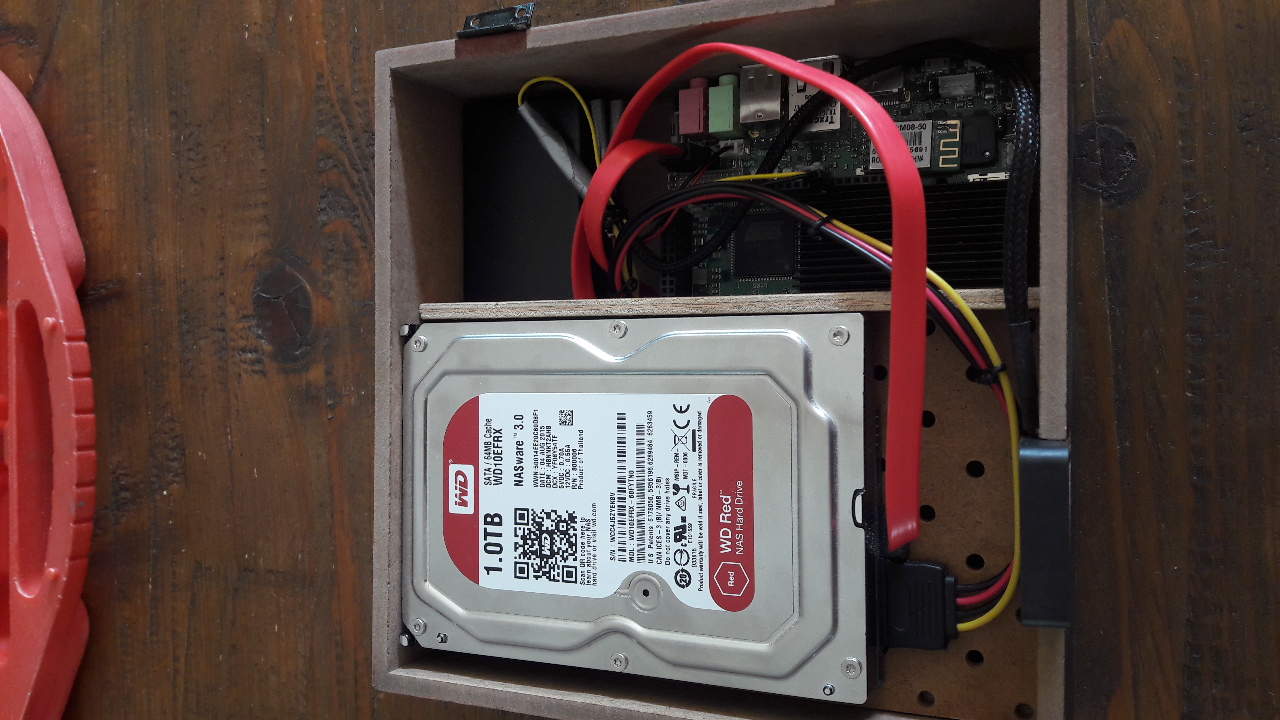
The hard drive is a Western Digital Red Pro 4TB 3.5" drive. In hindsight, a 2.5" drive would have been a better choice because they do not require a separate power source and because all available print models are made for a drive of this size. When I bought the drive, though, these 2.5" drives did not have the same storage for the same price. And for a poor student, price matters! To power the drive down when it is not in use, I use hd-idle. As a result, the drive is idle 99% of the time. I use smartd to monitor the drive. I have it set up to notify me of any pending failures and when the temperature gets too high.
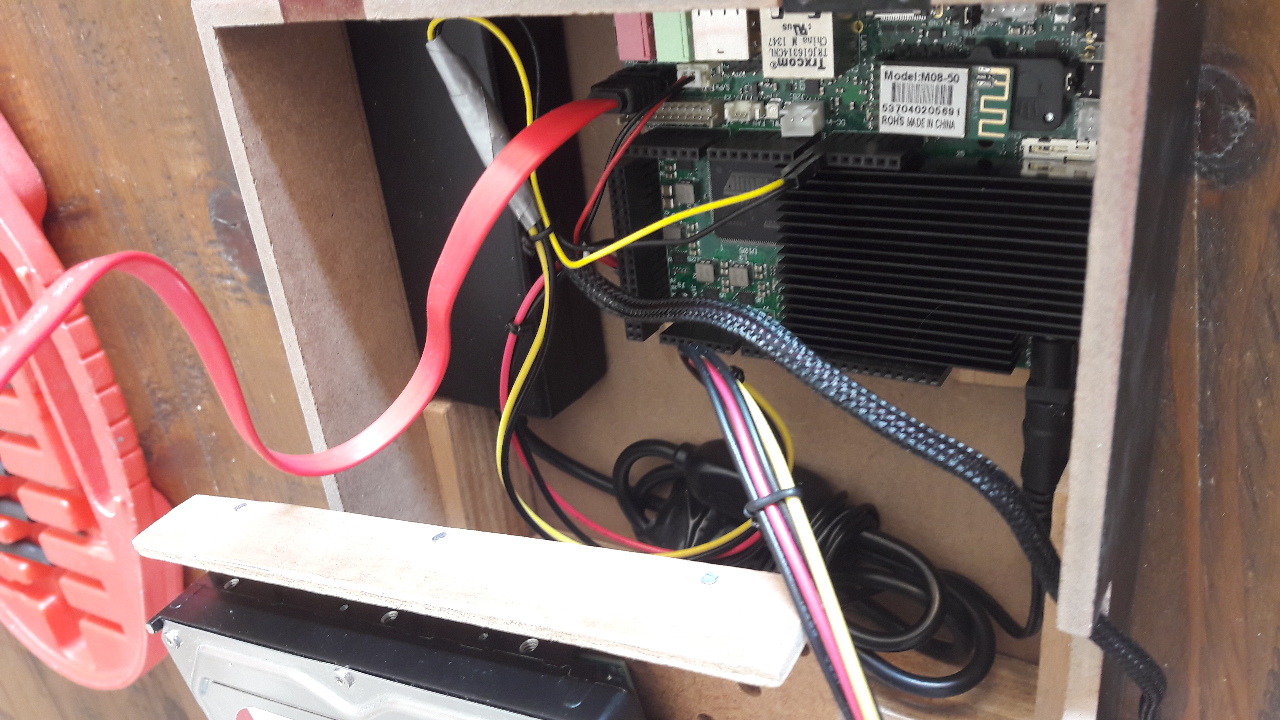
I followed this tutorial to wire the drive up to the UDOO. I don’t solder often, but even for me it was an easy process. As discussed below, the old case ran a little hot so I decided to add a fan later. At the time, the server was running from my bedroom and hence, I opted for a small and quiet 40x40x10 mm fan. The wiring diagram in the linked tutorial shows how to connect the fan, too.
If there is anything you want to know about the software, such as any configuration, feel free to send me an email.
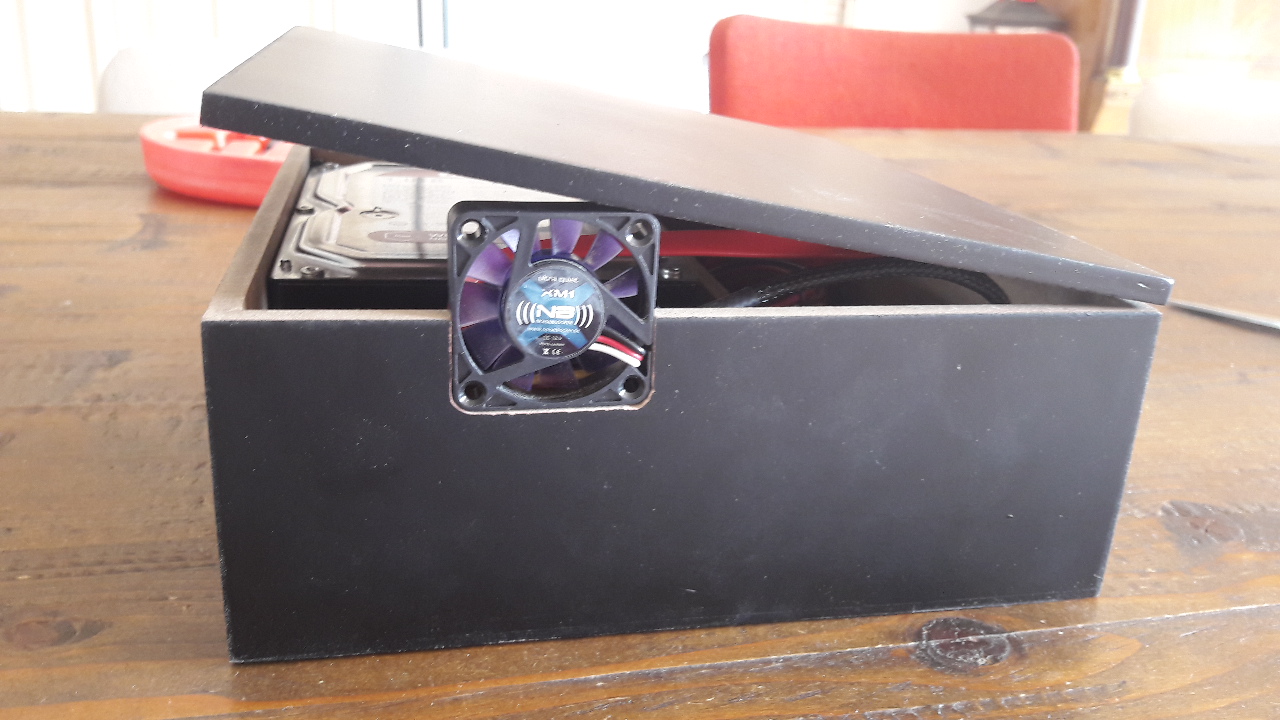
This case is made from an old wooden box; see the photos at the bottom of this page. This was all I could get my hands on for free, and the only thing I could work with since I had only done wood working before. It wasn’t bad and fulfilled its job well for a year, but I was never completely satisfied.
Firstly, it had the power converter on the inside and there was little to no air flow. This made the server and the attached hard drive idle at 35 to 40 degrees Celcius. While this wasn’t too high, it could certainly be lower. You’re right when you think the fan is not well-placed, but cooling the drive had priority and lower wasn’t an option.
Secondly, I just never really liked the design. Now you may ask yourself why this matters for a server that is hidden away in some dark corner, but the simple truth is that I am doing these things for fun and I’ll be damned if I am not satisfied with it 😉.
Finally, it was a pain to carve out ports, and every port I added was an increased chance of completely butchering the box. Hence, I only added what I really needed at the time, which obviously isn’t good from a modifiability perspective.
And yep, you guessed it: I never finished the box. It has been running half open like that gathering dust (surprisingly little, though) for a year.
So, I wanted something that fixes the above issues. All existing designs online are, however, made for a UDOO Quad without any drive at all, or only for 2.5" drives (obviously, these are just a better fit!). A month ago, I was doing my usual search to see if any new design appeared. Nothing did, of course. I did find a new design for a UDOO x86, with a 2.5" drive and a fan on the UDOO forums by a user named plasmac0r. As you can see, I asked plasmac0r if it would be possible to modify his design to fit my requirements. Understandably, he did not have time for that.
But why not “put on the naughty shoes”, as we say in The Netherlands, and try it myself? plasmac0r was kind enough to share the FreeCAD files with me, and before I knew it… I was completely lost.
Yes, this was an entirely different endeavor and I was way outside my comfort zone. By trial and error and some pointers from plasmac0r, it took me a few evenings and weekends to come up with a case that suited my requirements:
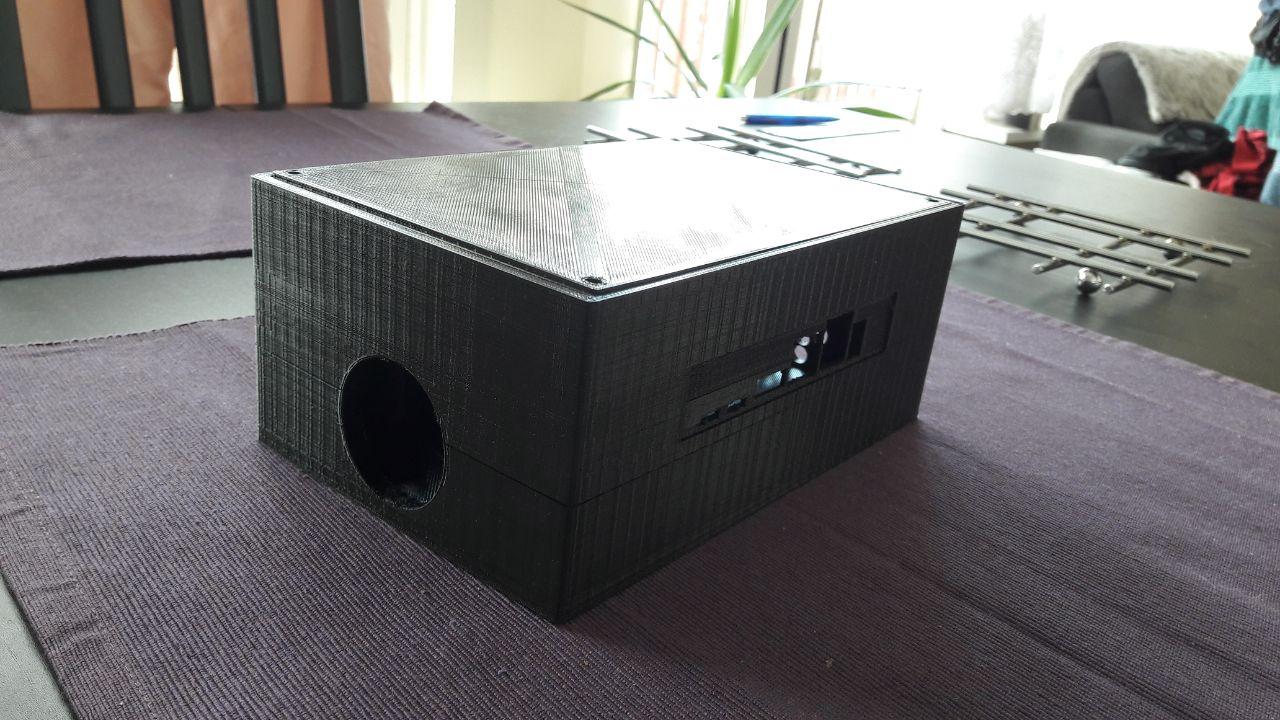
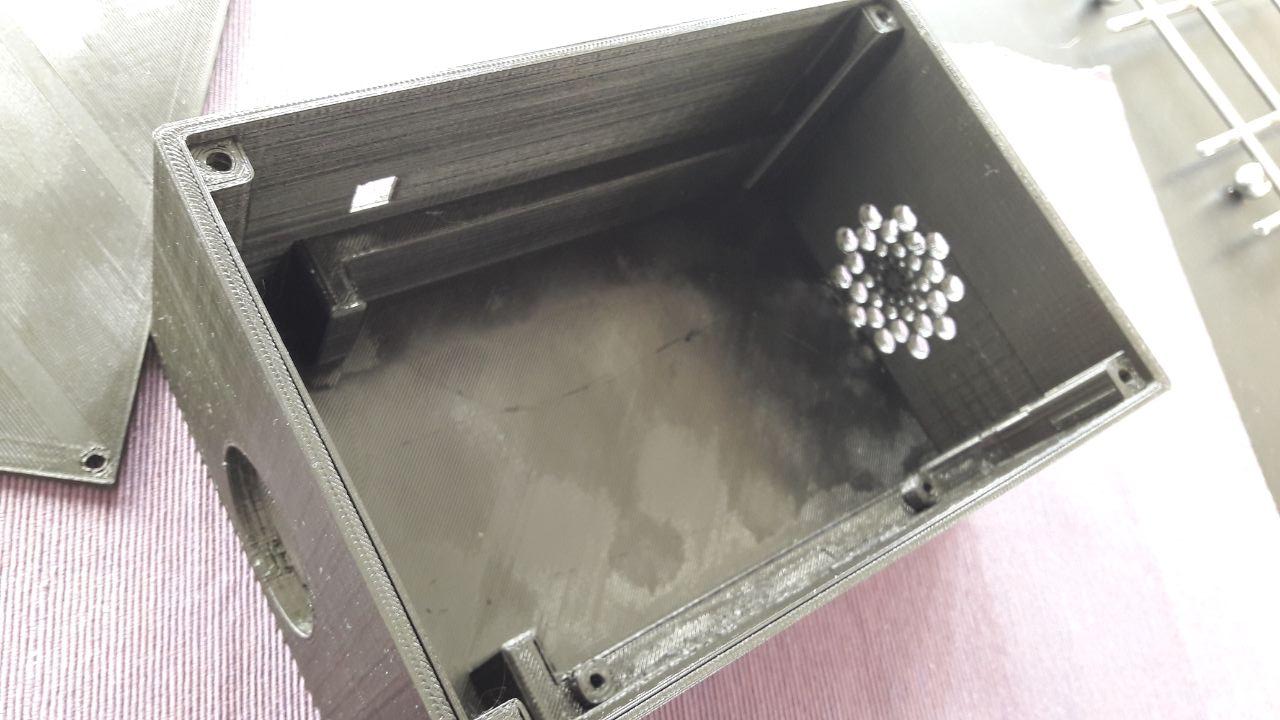
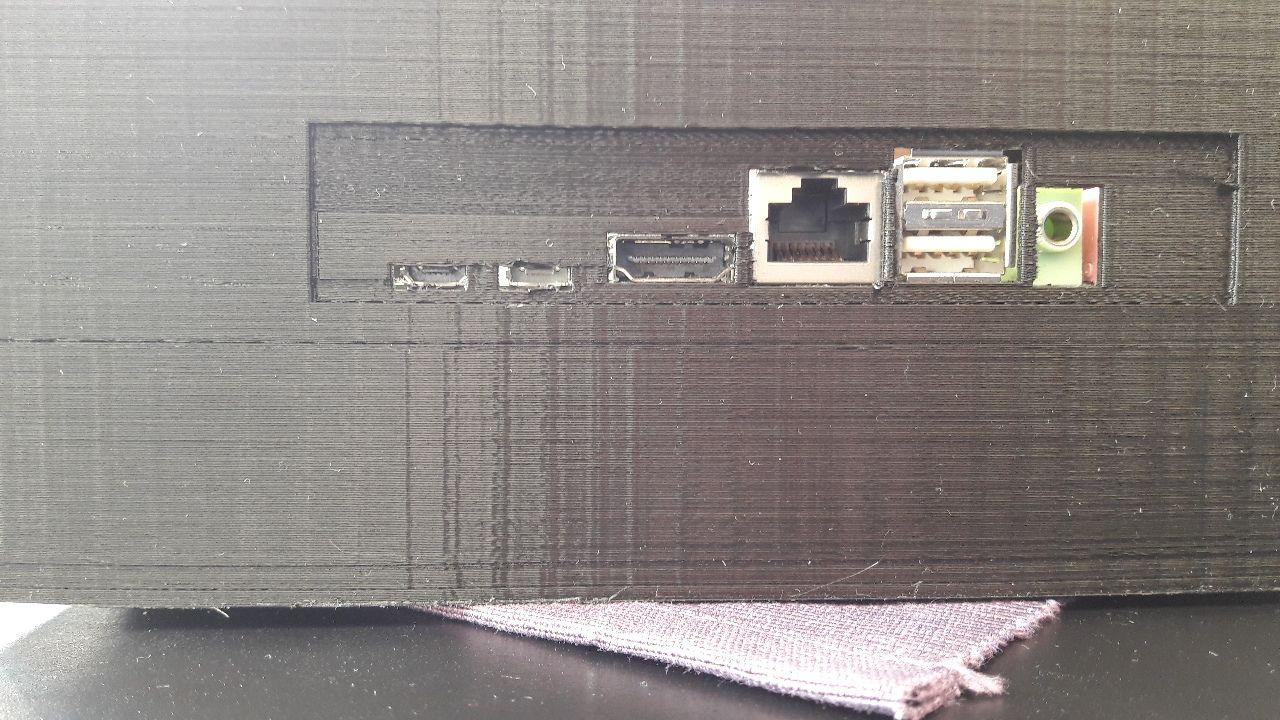
As you can see, it has ports for each connector on the UDOO, except the microphone jack because I really do not see myself using that anytime soon. There is also no SD card slot, because 1) the slot on the UDOO does not align with any wall and 2) I won’t be switching it anyway. Similarly for the power button: once it’s on, it’s on. There is also a proper air flow now, and the power convertor is now placed outside of the case.
Since I do not own a 3D printer (something something poor student), I had to find someone to print it for me. Hubs is awesome for this, and much cheaper than the alternatives. One company even gave me a price of €275! Since quality wasn’t that important, I opted (of course) for the cheapest. The printing took 20 hours for the case, and some more hours for the lid.
There is one problem with my design, which is that the space between the columns in the back is just too narrow to fit the hard drive. Indeed, when you look at the model, they are a little fatter than the supports on the sides; I am not sure how I did not notice this. In any case, this is easily solved with a dremel, and it’s on the inside anyway. I tried to fix this in my model after I noticed it in my case, but for some strange reason all but one columns disappear as soon as I change even one of them. If you know how to fix this, please do tell me so I can make a fixed version available.
To attach the fan, I cut four M4 16 mm screws to 14 mm (which do not exist for sale?). The UDOO is held in place with two M3 4 mm screws, and the lid is screwed in with four M4 16 mm screws.
All in all, this was a very challenging and fun project. It was awesome to design something and see it come to life through a 3D printer. The case is on display for a while, before I will hide it away again. I feel proud every time I see it 😊
My design is available on Thingiverse and announced on the UDOO forums.